Posts on theantiquedjourney.com may contain affiliate links. As an Amazon Associate, I earn on qualifying purchases. You can read the full privacy policy and disclosures here.
The Best Keepsake: Quick and Easy DIY Christmas Ornaments with Dried Greenery
By Rachel
|
Share this post. Share the Journey!
Last Updated on October 3, 2025 by Rachel
These quick and easy DIY Christmas ornaments with dried greenery add a personal touch to your decor. Momentous occasions deserve to be remembered and these make a lovely keepsake!
My sister recently got married and she wanted me to help her do something simple with some of the greenery from her bridal bouquet. With the holiday season here, these quick and easy DIY Christmas ornaments with dried greenery were just the ticket! By following the tutorial below, I hope you are inspired to create your own special keepsake.

Materials for Quick and Easy DIY Christmas Ornaments
- clear glass ball ornaments Tip: A budget friendly option would be to check your local thrift store for these; I found a pack of 12 for around $1.00.
- dried flowers or greenery
- ribbon
- scissors
- tweezers
- Optional: a vessel such as a bowl for display
The Best Keepsake: Quick and Easy DIY Christmas Ornaments with Dried GreeneryTutorial
Step 1: Prepare the Greenery.
Be sure all your plant pieces are dried out really well.
Then, you can go through the bouquet and snip off all the greenery that you would like to use inside the ornaments.

Step 2: Fill your Ornaments.
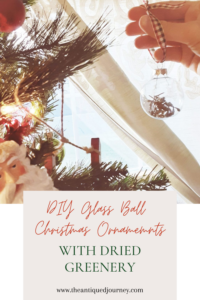
Take off the top of the ornament and insert a piece of greenery with either tweezers or the pointy part of a scissors. Gently push the greenery down into the bottom of the ornament and place the top back on.
Tip: It’s up to you how many pieces of greenery you would like in each ornament. I found that less is more so it doesn’t look too crowded.

Step 3: Attach the Ribbon.
Cut your ribbon to a desired length and tie onto the top of your ornament, either knotting it at the top or tying a bow. Tip: I used plaid ribbon because it felt very cozy and Christmas-like but you can choose any ribbon that you love to fit the look you’re going for.
Repeat the above steps until you have all of your ornaments filled!

Step 4: Display the Ornaments.
My sister had a very pretty white bowl that we placed most of the ornaments in as a centerpiece on her dining room table and hung the rest on her Christmas tree.
Tip: The bouquet greenery is what inspired these ornaments for me but you can use other items that are special to you such as jewelry, mementos, small photographs, pebbles or rocks, sea glass, or shells!

Closing Tidbits on The Best Keepsake: Quick and Easy DIY Christmas Ornaments with Dried Greenery
That’s it! From start to finish, this DIY took about 25 minutes. It’s super simple but adds such beauty to your home during this Christmas season. The elegance of the glass ball ornaments pairs perfectly with the natural elements of the greenery.
I hope you feel inspired to create these ornaments to either display in your home or give away as gifts! They are special keepsakes that will bring joy for years to come.
May you find the love, hope, joy, and peace that this special season brings.


If you are new here, I’m Rachel, the writer and content creator here at The Antiqued Journey. I’m so happy to have you! I encourage you to stop by the ‘about me’ page to get to know me a little more.
Here on the blog, you will find loads of inspiration for decorating with vintage and antique decor, simple DIY crafts and many thrifting adventures. If that interests you, I invite you to sign up for my e-mail. You will receive a free digital download as a thank you!
Follow Along with The Antiqued Journey
- The Antiqued Journey shop
- Shop exclusive content in my LTK shop!
Other DIY Posts to Enjoy


Feeling a little unsure where to start with vintage decor?
I created Found and Favored, a beginner-friendly guide that walks you through what to look for, how to spot quality pieces, and how to style vintage finds with confidence — without overspending or feeling overwhelmed.

Hey! I’m Rachel!
I’m so glad you are here! Old things are my jam. Antique malls and thrift stores are my happy places.
Here on the blog I love to share my excitement, knowledge, and ideas about all things antique, vintage, and thrifted. Let’s journey together!
Want to style vintage decor with confidence?
Get the beginner’s guide that will save you money and help you find real treasures.

Sign me up for the
Journey!
Sign up for free antique and vintage inspiration, DIY projects, and thrifting tips straight to your inbox.