Posts on theantiquedjourney.com may contain affiliate links. As an Amazon Associate, I earn on qualifying purchases. You can read the full privacy policy and disclosures here.
No Knit Needed: DIY Sweater-Wrapped Pumpkin Decor for Fall
By Rachel
|
Share this post. Share the Journey!
Learn how to easily DIY a chic sweater-wrapped pumpkin for fall decor, no knitting required!
I don’t know what it is about fall but it brings out my creative side. There is just something so comforting about a cozy autumn day combined with the joy of creating a simple seasonal project. Today, we’re chatting homemade pumpkin decor! While carving is fun, sometimes we all just want a mess-free and chic DIY. May I present the sweater-wrapped pumpkin! This project is incredibly easy, requires just a few supplies, and results in stunning pumpkin decor for fall.
Looks Like a Sweater, Feels Like Autumn: DIY Pumpkin Decor for Fall
This simple yarn DIY is an amazing way to transform an ordinary pumpkin into a charming fall accent that adds beautiful texture to any indoor, or outdoor, space.
In the following post, I’ll share with you the materials needed, easy to follow step-by-step instructions, and final styling tips.

So, grab your hot glue and let’s get started. I think you are really going to love this one!
Supplies: What You’ll Need
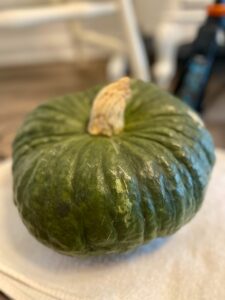
- 1 medium-sized pumpkin (any color will work, but I chose green for contrast)
- 1 skein of cream-colored yarn
- Hot glue gun and glue sticks
- Scissors
- Tape measure (optional)
Step-by-Step Instructions- No Knit Needed: DIY Sweater Wrapped Pumpkin Decor for Fall
Hello, guys!
It’s been a LONG time since I’ve shared a DIY here on the blog. As I stated at the beginning, fall brings out my creative side more than any other season, making me want to create things for the house.
So! That’s just what I did. On a lovely Saturday afternoon, I crafted an adorable yarn pumpkin, making it appear as if it’s wearing a cable-knit sweater.
Get your pumpkins ready for sweater weather! They will be kept cozy and warm with this heartfelt (and super simple) touch.
Let’s get into it!
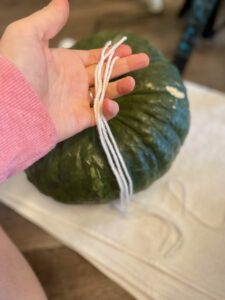
Step 1: Prepare the Yarn.
To start, I pulled yarn off the skein and folded it over on itself four times, like this.

Then, I cut the folds so that I had four separate pieces of yarn.
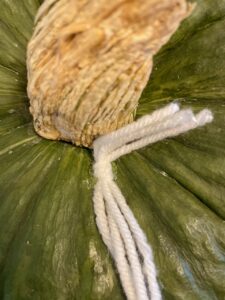
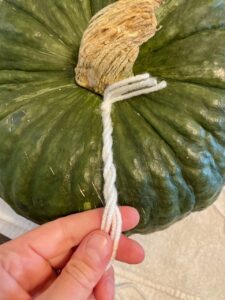
Step 2: Knot and Anchor
Next, knot the four yarn strips together.

Then, secure the knot to the top of the pumpkin with a generous dab of hot glue.
After securing, cut off the yarn bits above the knot. This creates a clean look at the top of the pumpkin. (You could also cut the top bits off before gluing if you find that to be easier.)
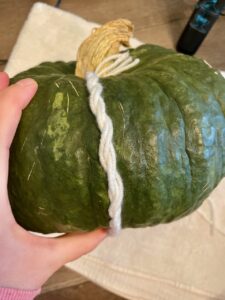
Step 3: The “Cable Knit” Braid
Next comes the wrapping process.
First, split the four strands in half so you have two strands on each side.
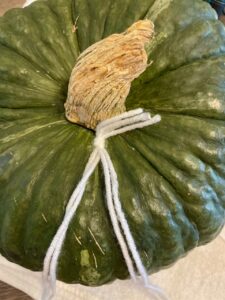
Then, wrap each strand of two around the other strand of two.
This twist results in creating the “cable-knit” effect.
Tip: Try not to wrap the yarn too tightly around itself. You want it to be a bit looser…it makes the cable-knit aesthetic look more authentic.
Continue the twist all the way down to the bottom of the pumpkin.
Make sure you have the twist long enough so that the yarn goes all the way underneath. You don’t want it to be too short otherwise the bottom strands will be seen from the sides.
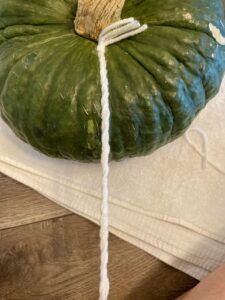
Step 4: Secure the First Strand
Wrap this first twisted strand all the way down the pumpkin.
Secure it with hot glue at the bottom.
Then, cut off any excess yarn, if necessary.

Step 5: Repeat and Space
Repeat the entire process (from twisting the strands to gluing the bottom) for the remaining yarn bundles and spacing them evenly, approximately 1-2 inches apart, around the pumpkin.
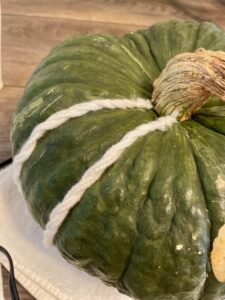
Feel free to use a tape measure if you want more even spacing, but I just eyeballed it!
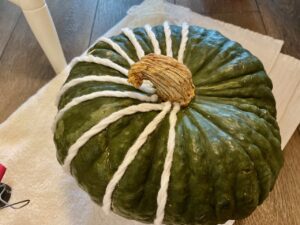
Step 6: The Finishing Touch
Once you have glued all of the ‘cable-knit’ pattern down, do a final check to ensure all strands are secure.
See how the finished pumpkin looks “dressed” in a sweater?! It’s so cute!!
This Pumpkin is Ready for Sweater Weather! Tips on Styling Your Cable-Knit Pumpkin
Now that you have an adorable piece of homemade fall decor, the next question is where to put it?? Well, the great thing is that DIY decor pieces such as this one can truly be styled anywhere!
Here are a few ideas to try either indoors or out:
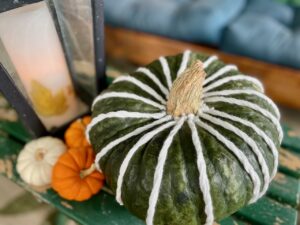
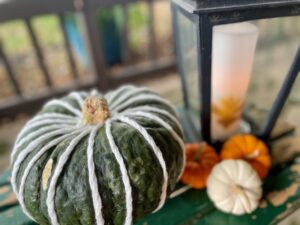
- As a Standalone Accent: Place the pumpkin on a mantel, shelf, or side table. A few faux candles add a cozy ambience, as well.
- In a Vignette: Group it with other fall decor like a rustic wooden bowl, smaller gourds or miniature pumpkins, or a few amber jars.
- For a Centerpiece: It would look amazing as a focal point of a fall tablescape.
- Mix & Match: Create a collection of sweater pumpkins using different colored pumpkins or types of yarn.
Closing Tidbits on No Knit Needed: DIY Sweater-Wrapped Pumpkin Decor for Fall
With very little money, this simple project can make such a huge impact on your fall decor!
I hope you feel inspired to try the DIY for yourself. Any kind of homemade decor feels so rewarding in the end because you crafted it with your own two hands.
Be encouraged to create this fall, finding a slow rhythm and quiet pace of life along the way.

Leave me a comment! What color pumpkin and/or yarn will you use for this cozy DIY? I love hearing from you!
 PIN the image below to save it for later!

If you are new here, I’m Rachel, the writer and content creator here at The Antiqued Journey. I’m so happy to have you! I encourage you to stop by the ‘about me’ page to get to know me a little more.
Here on the blog, you will find loads of inspiration for decorating with vintage and antique decor, simple DIY crafts and many thrifting adventures. If that interests you, I invite you to sign up for my e-mail. You will receive a free digital download as a thank you!
Follow Along with The Antiqued Journey
- The Antiqued Journey shop
- Shop exclusive content in my LTK shop!
Shop My Favorite DIY Supplies

Other Posts to Enjoy
Cozy Vintage Fall Decor for Any Room

7 Easy Fall Decor Ideas You’ll Love

Thrifty Fall Patio and Porch Decor

Feeling a little unsure where to start with vintage decor?
I created Found and Favored, a beginner-friendly guide that walks you through what to look for, how to spot quality pieces, and how to style vintage finds with confidence — without overspending or feeling overwhelmed.

Hey! I’m Rachel!
I’m so glad you are here! Old things are my jam. Antique malls and thrift stores are my happy places.
Here on the blog I love to share my excitement, knowledge, and ideas about all things antique, vintage, and thrifted. Let’s journey together!
Want to style vintage decor with confidence?
Get the beginner’s guide that will save you money and help you find real treasures.

Sign me up for the
Journey!
Sign up for free antique and vintage inspiration, DIY projects, and thrifting tips straight to your inbox.