Posts on theantiquedjourney.com may contain affiliate links. As an Amazon Associate, I earn on qualifying purchases. You can read the full privacy policy and disclosures here.
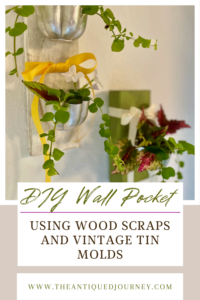
Up-Cycle Tin Molds Into Stylish Vintage Wall Pockets
By Rachel
|
Share this post. Share the Journey!
Last Updated on January 15, 2026 by Rachel
This easy-to-follow tutorial will show you how to up-cycle tin molds into stylish vintage wall pockets!
Do you have a collection of vintage tin molds gathering dust in your storage room? Don’t let these charming pieces go to waste! Instead, use them, along with a few pieces of wood scraps, to craft charming and functional decor. Follow along as I show you how to up-cycle tin molds into stylish vintage wall pockets on a budget!
Eco-Friendly DIY: Repurpose Materials for Stunning Wall Pockets
In this article, we’ll explore the art of sustainable up-cycling and how you can transform forgotten treasures into eye-catching wall organizers.
Join me on this creative journey as we delve into the world of thrift store craft finds and discover the endless possibilities of repurposing them into practical and chic wall pockets. So, gather your tools and let’s get crafting!

What is the Purpose of a Wall Pocket?
Wall pockets are useful and versatile pieces of home decor. Simply put, a wall pocket is used to hold things.
They can be used for decorative purposes, such as a vase for flowers, or for utilitarian purposes such as storage for pens, keys, or paintbrushes.
How to Style and Display Wall Pockets
There are endless possibilities for using and styling wall pockets in your home.
Here are a few ideas:
- store matches inside
- use it to hold scissors, needles, and thread
- kitchen utensil storage
- as a vase for flowers or greenery
- style a grouping of them on a wall as an art display
- use them for seasonal decor
- hang them on a patio or deck to hold bug spray, sunscreen, or outdoor dining accessories
Materials Needed for DIY Wall Pockets
Below is a list of all the materials and supplies that I used to create my wall pockets. If you need any of the supplies, simply click on the words and the link will take you right to it!
- wood scraps ( I used two pieces)
- vintage tin molds
- ribbon
- screws
- hammer
- screwdriver
- drill (optional)
- craft paint in green and white
- antiquing wax (optional)
- paintbrush
- foam dobber (optional)
- tape measure
- metal hooks for hanging
- pencil
Thrift Shopping for DIY Home Decor
First, let me share a quick back story.
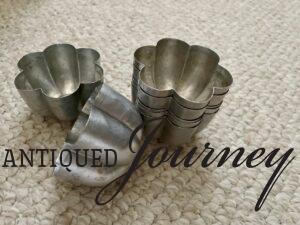
A few months ago, as I was doing my weekly thrift shopping round, I came across a set of vintage tin molds for just .99 cents! While I didn’t know what I would do with them at the time, I purchased them anyways because I knew, eventually, inspiration would strike.
So, my advice to you is, besides hunting for home decor or collectibles while thrifting, always keep your eye out for possible items to use for DIY projects.
I’ve come across craft paint, floral foam, florals, wooden accents, ribbon, stickers, etc…at the thrift store for mere cents! Buy them when you see them because it’s SO much cheaper than purchasing them from the craft store.
Up-Cycle Tin Molds Into Stylish Vintage Wall Pockets: Step by Step Tutorial
A few weeks ago, creativity struck on what to do with my found vintage molds.
This easy to follow guide to making wood and vintage tin mold wall pockets will give you the needed steps to create similar ones for your own home! As always, this DIY is meant to be a jumping off point. By all means, if something doesn’t quite work for you, tweak it as you see fit.
Let’s get into it!
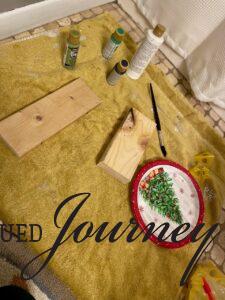
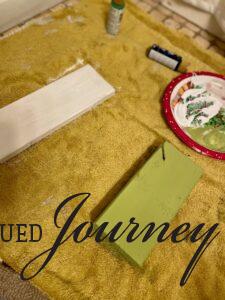
Step 1: Prep Wood for Paint.
The first thing to do is prepare your wood pieces for painting. This is a great time to use up scrap pieces of wood! I had a bunch of small wood cut-offs in my garage from various house projects, so I just dug in the pile until I found two that would work.
Note: If you don’t have wood scraps, you can buy small pieces from a hardware store. Crafts stores also sell decorative wood pieces.
To do this, I laid down an old towel to protect my floor from any paint spills. I then laid out my wood pieces and prepped my paint.
Step 2: Paint Wood Pieces.
Next, I started painting the wood.
Since I had two pieces of scrap wood to use, I chose to use two different colors. But, you could opt to use one color.
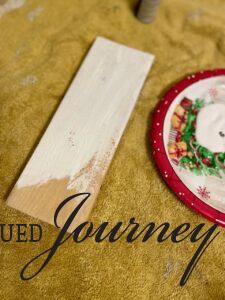
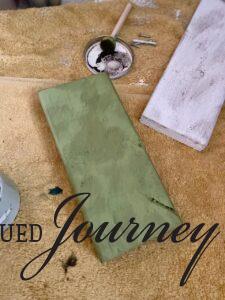
The thicker wood piece I painted green and the thinner one I painted white.
I painted each piece of wood with one coat and let them dry. It wasn’t quite enough paint coverage so I ended up painting a second coat on each.
All said and done, with the painting and drying time, this step took about two hours.
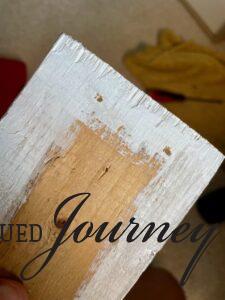
(Optional) Step 3: Apply Antiquing Wax to Wood.
As noted, this step is optional but I think it adds so much character to the overall aesthetic.
My friend Anna from Sky Lark House sent me a goodie box awhile back and this antiquing wax was inside! I’ve been wanting to try it on a DIY project and figured this would be a good time.
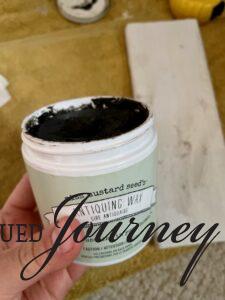
Since I had never used this product before, I opted to use a foam dobber to apply it. Using a very tiny amount of the wax, I made a few messy strokes back and forth on front of the white wood piece as well as the sides.
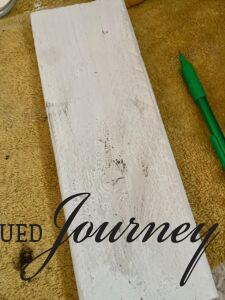
Notice how the wax just gives the slightest hint of vintage color…making the wood look not so perfect?
That’s exactly what I was hoping it would do!
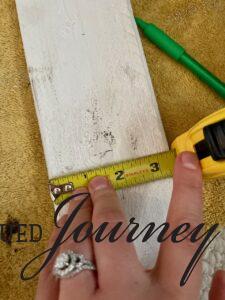
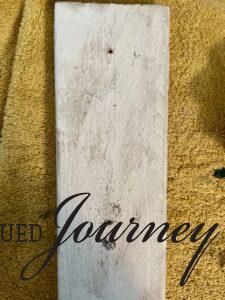
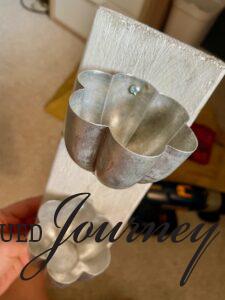
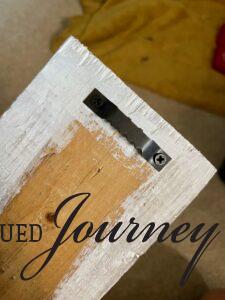
Step 4: Drill Holes into Wood.
After that wax dried, which didn’t take long at all, I used a tape measure to find the center of the wood and marked it with a pencil.
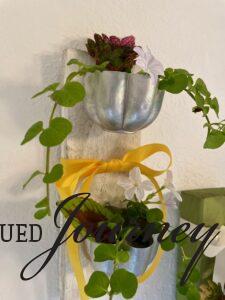
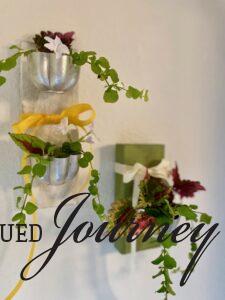
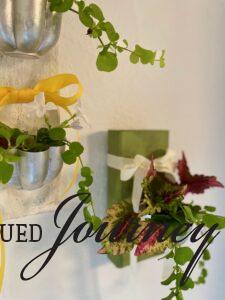
This is where the vintage molds will be screwed into.
Also, note here that, with the white wood piece I am making a double wall pocket, meaning attaching two tins to the wood. The green wood piece I am only attaching one tin.
So, if you have a larger piece of wood, you could make more holes to attach more tins…wouldn’t it be neat to attach five molds for a nice, big wall pocket?!
To make the hole(s) in the wood for attaching the tin(s), I used a screw and drill and drilled a small hole right into the pencil mark.
Tip: So that the mold stays in place, drill the screw a little more than halfway through the wood piece and then back it out with the reverse drill setting.
This is what the hole looks like on the green wood piece.
I used the same process on the larger white piece of wood.
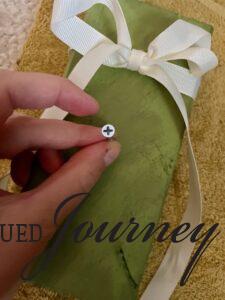
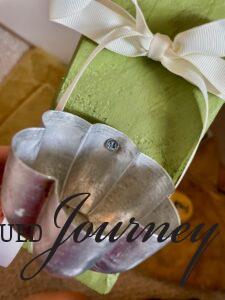
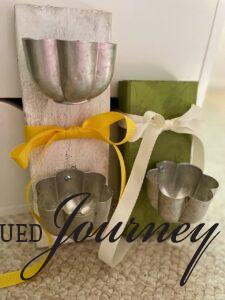
Step 5: Attach Vintage Molds to Wood.
Once that part was finished, I then turned my attention to actually attaching the tin molds to the wood.
There aren’t any pre-drilled holes in the tins themselves, so I had to make holes.
To do so, I placed a screw on the tin where I wanted the hole to be. Then, I used a hammer to pound the screw through the tin to make a hole.
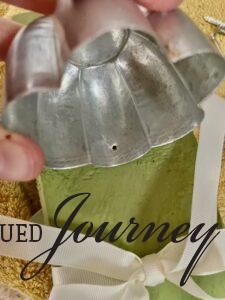
Finally, using the same screw, I used a screwdriver to attach the mold to the wood.
Voila!
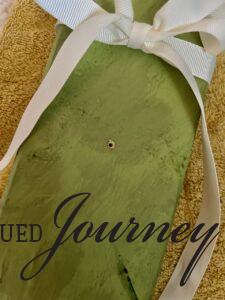
Again, the same process was repeated for attaching the tins for a double wall pocket.
Step 6: Screw Hangers to Back.
To be able to hang the wall pockets from the wall, hangers are necessary.
I measured the back to find the center, then pre-drilled two small holes for the screws.
Then, since I already had my holes, I easily used a screwdriver to attach the hanger to the back!
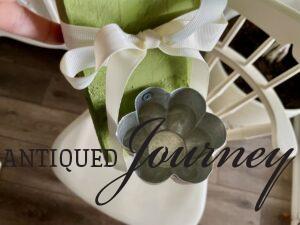
(Optional) Step 7: Tie on Ribbon.
The last step in the process is also optional but, again, I think it adds such a charming look to the wall pockets!
I already had ribbon in my craft drawer, so I simply chose two coordinating ribbon colors to tie on to each wall pocket.
For the single wall pocket, I tied on a cream colored ribbon near the top. And, for the double wall pocket, I chose a yellow ribbon to tie around the middle.
DIY Wood Wall Pocket Vase with Flowers
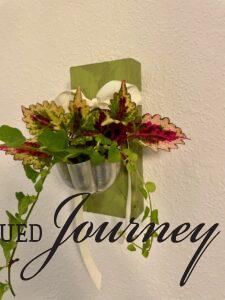
With that, we have two finished wall pockets!
Now all that’s left to do is fill them. Starting out, I knew I wanted to use my wall pockets as vases for flowers so that’s just what I did.
I went out to my potted plants on the patio and clipped a few flowers and greenery to use in my wall pocket vases.
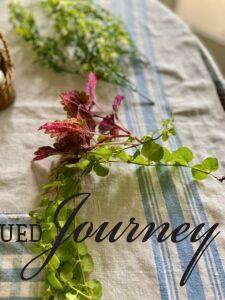
Then, I added a little water to each mold.
Using my garden clippings, I arranged small bouquets in each vintage mold.

I truly ADORE how these wall pockets turned out.
The combination of the wood and vintage tins paired with the ribbon and fresh flowers is just stunning!
It’s amazing what can be accomplished using a thrift store find and some scrap wood, isn’t it?!
I have my DIY wall pockets styled on an open wall next to the hutch in my dining room.
Styling Wall Pockets for Seasonal Decor
But you know what else?!
These wall pockets can be used seasonally by tweaking them for specific holidays or occasions.
Think:
- faux wheat or leaf stems for fall
- red berries with spruce stems for Christmas
- pine or cedar stems for winter
- fresh flowers for spring and Easter
- colored ribbon to fit each season
See what I mean?! Due to the neutral aesthetic and calm nature of these wall pockets, they are extremely versatile and will totally work all year round!
Closing Tidbits on How to Up-Cycle Tin Molds Into Stylish Vintage Wall Pockets
I hope that, through this tutorial, you can see the benefits of using what you have to create something amazing and completely unique.
Up-cycling vintage tin molds into stylish wall pockets is not only a creative and eco-friendly way to decorate your walls but you are also decorating your home with something that no one else has. How cool is that?!
Be encouraged to get creative, finding limitless potential along the way.

Leave me a comment! Do you use wall pockets in your home? Would you make these? I love hearing from you!
Follow Along with The Antiqued Journey
Pinterest | Facebook | Instagram | LTK | Amazon | Lowe’s
 Click the red button in the corner to save it for later!
If you are new here, I’m Rachel, the writer and content creator here at The Antiqued Journey. I’m so happy to have you! I encourage you to stop by the ‘about me’ page to get to know me a little more.
Here on the blog, you will find loads of inspiration for decorating with vintage and antique decor, simple DIY crafts and many thrifting adventures. If that interests you, I invite you to sign up for my e-mail. You will receive a free digital download as a thank you!
Shop Wall Pocket Decor

Other Posts to Enjoy
Feeling a little unsure where to start with vintage decor?
I created Found and Favored, a beginner-friendly guide that walks you through what to look for, how to spot quality pieces, and how to style vintage finds with confidence — without overspending or feeling overwhelmed.

Hey! I’m Rachel!
I’m so glad you are here! Old things are my jam. Antique malls and thrift stores are my happy places.
Here on the blog I love to share my excitement, knowledge, and ideas about all things antique, vintage, and thrifted. Let’s journey together!
Want to style vintage decor with confidence?
Get the beginner’s guide that will save you money and help you find real treasures.

Sign me up for the
Journey!
Sign up for free antique and vintage inspiration, DIY projects, and thrifting tips straight to your inbox.
17 Comments. Leave new
I love these Rachel! They came out great and I love how you styled them. XO- MJ
Thank you!! This was a fun one 🙂
Beautiful molds. Love them and as a baker would love to use them for baking.
Found your post on Farmhouse Friday Link Party. My entries this week are numbered #39+40
Hope you will join/share M-Sat at https://esmesalon.com/tag/seniorsalonpitstop/
Thanks so much!
[…] project! Using some .99 thrifted vintage tin molds and a few pieces of scrap wood, I created some stylish wall pockets. You can totally make these…check out the full post for the […]
Hey Rachel – These are adorable. You could also put them on the patio and fill them with the flameless LED candles. Or in the spring, fill with violas! So many great possibilities.
Thank you!
I love the candle idea!!
Isn’t it interesting how you get the feeling you need to buy something at the thrift store, even if you’re not sure how to use it?? Those molds are adorable and this project turned out so cute! I know you’re glad you bought them!!
Yes! I totally agree. Thanks so much, Donna!
Love the way these came together Rachel. You can use them for so many different things and in so many different seasons too. I see these a lot and never know what to do with them so I pass them by but I’m definitely going to be on the look out again. These are so cute! Big hugs and hope you’ve had the best summer, CoCo
Hello!
Thanks so much! Hope you are well!
Now this is thinking out of the box! I love them! So creative. Thanks so much for sharing it with us on Farmhouse Friday 360. I’ll be featuring this post tomorrow. Always love what you share. pinned
Thanks so much, Cindy! Appreciate it!
I love this idea and will use it on some of my many, many jello molds! Thanks for the inspo!
Hi, Sandra!
Thanks so much! That’s amazing…so happy to help you find a use for them! Enjoy the day!
I have larger molds. About 8 inches and limited wall space. Any ideas? Oh yes, I have 5..they were my Grandma’s so kind of sentimental
Thanks!
Hi, Bonie!
One idea right off the top of my head is to hot glue them in a round, wreath shape to a solid wreath or wood form, and then they could be used as tea light candle holders! I’ve also seen them used in faux wreath’s hanging on a door…simply put a little hot glue on the side of each and nestle them in amongst the wreath branches.
Hope that helps! Thanks for coming by today!