Posts on theantiquedjourney.com may contain affiliate links. As an Amazon Associate, I earn on qualifying purchases. You can read the full privacy policy and disclosures here.
How to Make a Thanksgiving Gratitude Tree with Paper Leaves
By Rachel
|
Share this post. Share the Journey!
Last Updated on October 31, 2025 by Rachel
This DIY Thanksgiving gratitude tree with plaid, paper leaves will fill your home with a thankful ambiance!
As we inch ever closer to Thanksgiving, it’s the perfect time to reflect on the many things we are grateful for. And, what better way to do that than by creating a Thanksgiving gratitude tree with paper leaves? This simple and meaningful craft project will not only add a festive, handmade touch to your holiday decor but it will also serve as a daily reminder to appreciate the blessings in our lives!
A Tree of Thanks: Creating a Paper Leaf Gratitude Tree for Thanksgiving
Gratitude is a powerful emotion that can transform our perspectives and improve our overall well-being.
So, let me ask you a question. What are you thankful for? That seems like such a cliche question that, in day to day life, gets bypassed and rushed through.
But, I’m truly interested in the things, people, places, etc…that you are grateful for and make life meaningful and full of joy. I’d love to know in the comments!
Today, we are going to embark on a creative journey of gratitude! In this post, I’ll guide you through the process of making your own gratitude tree, step by step. From materials needed to tips for writing meaningful notes, I’ve got you covered.
So, gather your scissors, glue, and paper and join me as we celebrate the spirit of Thanksgiving like never before!
Thrifted and Foraged Thanksgiving Tree
Before we get into the project, let me briefly highlight why I decided to make this tree.
When I am brainstorming and coming up with DIY projects to share with you here on the blog, I always have two things top of mind that I ask myself. 1) Is it relatively easy? and 2) Is it affordable? If I can answer ‘yes’ to both of those questions, it’s a go!
This Thanksgiving tree craft that I’m sharing with you today has many positive aspects.
1) It’s affordable. I foraged outside for my branch, making that free. The jug that I used for the base was thrifted for a few dollars.
2) It’s easy. For this project, you only need paper, a hot glue gun, a marker, and some scissors.
3) You can make it as straightforward or as personalized as you want! Keep it super simple or add other touches or embellishments to it.
All in all, this Thanksgiving craft is extremely sustainable due it the use of thrifted and natural materials. It’s a win-win for everyone!

Materials Needed for DIY Thanksgiving Tree
I’ve linked all materials, that I could, highlighted in green.
- large tree branch
- glass jug or vase
- DOUBLE SIDED plaid cardstock
- leaf template
- marker or pen
- hot glue gun and glue sticks
- rubber finger protector ( optional but highly recommend)
How to Make a Thanksgiving Gratitude Tree with Paper Leaves: Step-by-Step Instructions
Below, you will find the steps that I followed to create my tree. As always, tweak things as you see fit!
1. Foraging the Branch.
First, you will need a medium-large sized branch. This will act as your ‘tree’.
I happened to stumble upon the most perfect branch on a walk with Tilly. Imagine the scene as I’m dragging this giant tree branch home while trying to walk Tilly at the same time 🙂
Due to that, I wasn’t able to snap a photo at that time but you’ll see my branch coming up.
My tip for the branch is to find one that has a plethora of smaller branches coming off of the large, main one. For a full and cohesive looking tree, you want it to look pretty symmetrical on either side.
I didn’t do anything specific to prepare the branch other than making sure it didn’t have any bugs on it and that it was free of excessive dirt.
2. Insert Branch Into Base.
After you have a branch, the next step is to stick it into whatever you are choosing to use as your base. Not wanting to buy anything ‘new’, I chose to use this thrifted glass jug that I had in my stash.
Make sure your base is large and heavy enough so that the ‘tree’ doesn’t tip over. If your branch has some wobble to it, consider using floral foam or stuffing some paper around the bottom of the branch to steady it.
Ideas for bases can include:
- crock
- glass jug
- wood crate
- galvanized bucket
- a basket

3. Creating the Leaves.
The next step is to print off a leaf template. You could also opt to draw or trace your own leaf shape!

The one I included above in the materials list is the leaf shape I used. I like that one because it’s super easy to cut out. Initially, I wanted to use a Maple leaf shape but then quickly realized how much of a pain it would be to cut out 50 leaves in that shape!
I cut out the leaf template shape and was able to trace about 5 leaves onto each piece of plaid paper. The plaid card stock pack that I ordered is amazing. I love the different plaid patterns and was super happy with the variety of plaid leaf shapes.
As for the amount of leaves, I recommend tracing at least 50 leaf shapes just to make you have enough. This is also why you want to use double-sided card stock or paper…it will cut your cutting and gluing time in half!

Then, after I finished tracing, I simply cut them out.
To make the process go faster, I cut out 3 sheets at a time.

Once all of the leaves were cut out, I ended up with a pile that looked like this.

4. Assembling the Tree.
The first thing you want to do for this step is to plug in your hot glue gun and let it heat up.
While you are waiting, I recommend taking a minute to look at your branch and assess how, and where, you want to go about placing the leaves.
What made the most sense to me is to start at the bottom and work my way up.
Gluing on the Leaves
When you are ready to glue, squeeze a very small amount of hot glue on to the bottom stem of the leaf.
You literally just need a dab….don’t overdo it on the glue otherwise it will be easily seen from the opposite side of the tree. Also be sure to pull off any glue strings as you go.
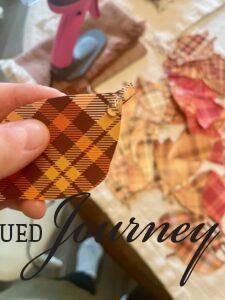
Then, being very careful not to burn your finger, gently press the leaf onto the branch.

And, Voila!
One down, many more to go 🙂 Continue this process until you have all of the leaves glued on that you want.
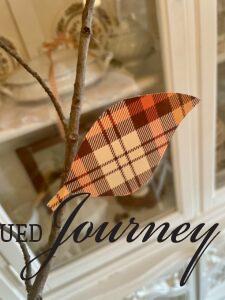
Tips for Attaching the Paper Leaves
There is no right or wrong way to attach the leaves. However, I do recommend spacing out the patterns of the plaid so that the same two patterns are not right next to each other.
I also recommend varying the angles of the leaves. If you think about a real tree, none of the leaves are facing the exact same direction at any given time. So, my tip is to glue them straight, diagonally either up or down, etc…

And! If you plan on using this tree as a centerpiece, it will be seen from both sides. SO! Be sure to also turn the tree around and glue just as many leaves to the opposite side as you did to the first.
That way, the Thanksgiving tree will look complete when seen from all angles.
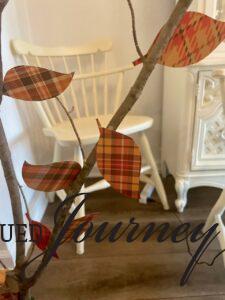
Adding Thankful Thoughts to Your Tree
Now, to add the gratitude part to the gratitude tree, here’s what I did.
As I was picking and choosing which leaves to glue, about every 6th leaf, I would write something on it that I’m thankful for using a Sharpie marker.
So, on this leaf, I wrote ‘Tilly’.
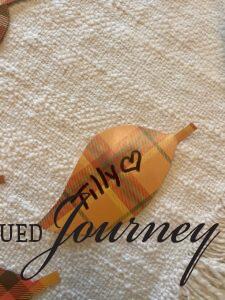
Then, I chose an area on the branch that was bare to glue it.
When gluing the thankful thought leaves, also make sure to space them out evenly throughout the tree. And, remember to include some on both sides of the tree!
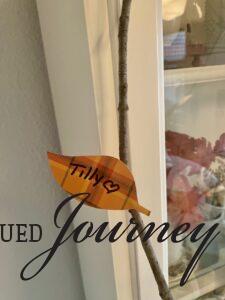
It’s up to you how many thankful thoughts you want to write on the leaves. I did about 10 words, so 10 leaves, but you can opt to do more or less depending on the aesthetic you are going for.
Now, the other part that comes with the thankful thoughts is that you can give your guests the opportunity to write their thankful thoughts on empty leaves. Leave out a few markers at the base of the tree for them to do so!

Display and Decorating Ideas with a DIY Thanksgiving Tree
With a completed thanksgiving tree, you can now display it and decorate with it for the holiday!
Truly, this DIY tree will look beautiful anywhere you choose to put it.
But, here are some placement ideas for your finished tree:
- use it as a table centerpiece
- place it on a mantel or hearth
- style it in an entryway
- set it on a side table or credenza
- on a kitchen counter
- as the focal point on a sideboard to accentuate a charcuterie or drink station

I decided to use my tree as a decor piece. So, for a simple yet elegant Thanksgiving tree display, I placed the tree on an extra chair.
Then, I surrounded the base of the tree with a vintage linen and a few faux pillar candles.

Additional Tips and Embellishments To Add To a Thanksgiving Gratitude Tree DIY
When creating crafts, there are always many variations to try.
I wanted to keep my tree pretty simple so I kept it looking natural. However, there are other things you could add or embellishments you could try to really make it your own and add your creative spin to it.
Other ideas to add on a Thanksgiving tree can include:
- spray painting the branch gold, copper, or bronze
- adding glitter to the edges of some or all of the leaves
- gluing on small pinecones or berries to the branches
- tying thin ribbon to some of the branches
- using a different pattern or color of card stock

Closing Tidbits on a Paper Leaf Gratitude Tree for Thanksgiving
Mindful and meaningful decor is the heartbeat of seasonal celebrations. I truly hope that, through this tutorial, you are encouraged to take care of our Earth and create DIY decorations using natural or thrifted materials.
Creating a Thanksgiving gratitude tree is a simple yet meaningful way to express thankfulness during the busy holiday season. By following these easy steps and using the tips for making paper leaves, you can create a beautiful symbol of thankfulness that will bring warmth and positivity to your home!
Be encouraged to spread thankful thoughts and grace this Thanksgiving.

Leave me a comment! How would you use a gratitude tree? I love hearing from you!
Follow Along with The Antiqued Journey
Pinterest | Facebook | Instagram | LTK | Amazon
 Save it for later by clicking the red button in the corner!

If you are new here, I’m Rachel, the writer and content creator here at The Antiqued Journey. I’m so happy to have you! I encourage you to stop by the ‘about me’ page to get to know me a little more.
Here on the blog, you will find loads of inspiration for decorating with vintage and antique decor, simple DIY crafts and many thrifting adventures. If that interests you, I invite you to sign up for my e-mail. You will receive a free digital download as a thank you!
Shop my Favorite Thrifting Supplies
Other Fall Posts to Enjoy
Want to decorate with vintage finds more confidently?
I created a beginner-friendly, 34-page digital guide to help you collect, identify, and style vintage decor with intention—without overspending.

Hey! I’m Rachel!
I’m so glad you are here! Old things are my jam. Antique malls and thrift stores are my happy places.
Here on the blog I love to share my excitement, knowledge, and ideas about all things antique, vintage, and thrifted. Let’s journey together!
Want to style vintage decor with confidence?
Get the beginner’s guide that will save you money and help you find real treasures.
Sign me up for the
Journey!
Sign up for free antique and vintage inspiration, DIY projects, and thrifting tips straight to your inbox.







3 Comments. Leave new
This is so fabulous Rachel! It looks wonderful and I love that you can add words you are thankful for to the leaves. Using double-sided paper is genius so it looks good from all angles! Pinning now!
Thanks, Donna! This was super fun to make 🙂
[…] past Thursday, I shared a brand new DIY post on how to craft a gratitude tree for Thanksgiving! With just some paper, scissors, and glue, you can create a beautiful and meaningful decor piece […]