


Last Updated on November 6, 2021 by Rachel Granholm
This DIY project will teach you how to make a lemon garland!

The DIY orange garland, which you can find here, was quite popular so I thought I would try a different fruit! Lemons are so fresh and the yellow color is so vibrant, making it a perfect decoration for summer. Follow along as I walk you through this easy project on how to make a lemon garland as well as some ways to display it in your home!
This post contains affiliate links. That simply means I make a small commission at no extra cost to you. As an Amazon Associate, I earn on qualifying purchases.
Materials Needed
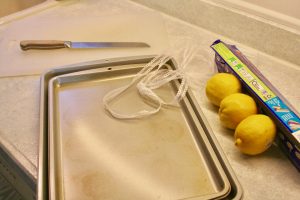
- 2-3 medium size lemons
- thin white ribbon
- baking sheets
- an oven
- a poking skewer (like a chopstick or a metal straw)
- parchment paper
- cutting board
- knife
- scissors
- oven mitt and hot pads
Directions:
1. Prepare the baking sheets. Cut the parchment paper to size of your baking sheets. Line each of your baking sheets with the paper and set aside. Then, preheat your oven to 225 degrees.

2. Slice your lemons. Using a cutting board and a sharp knife, start by cutting the ends off each lemon. Then, slice your lemons into thin slices, no thicker than 1/2 inch. Place each slice onto the parchment paper making sure they are evenly spaced apart. Tip: I recommend using 2 whole lemons to make sure you have enough slices.

3. Poke a hole in the middle. Using the end of a chopstick, a metal straw, or something similar, poke a small hole right through the middle of each lemon slice.

4. Bake the lemon slices. This step will really vary by oven. Start with 30 minutes and then check them. If they still seem pretty soft, bake for another 15 minutes. The tricky part with this step is that you don’t want the lemons to bake too long and get dark or they will look like oranges! I really just went by look. If the edges of the lemons looked a little wrinkled but still yellow that’s when I took them out of the oven. Tip: For reference, I baked my first batch too long resulting in burnt lemons. I tried a second batch and upped the oven temperature to 235 and baked for 30 minutes, checked, then baked again, 6 minutes at a time. I actually let my lemons sit out for 24 hours after baking and that was perfect in helping with the drying process.

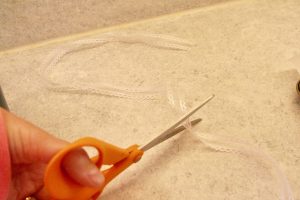
5. Cut the ribbon. Cut your ribbon into a piece that is roughly 12 inches long or multiple pieces if you want to make more than one garland. (you can obviously go longer or shorter depending on how you want to display it)
6. Thread the lemon slices onto the ribbon. Starting at the far end of the ribbon, slide one lemon slice on, pull the ribbon through the hole in the lemon slice, and knot it off around top of the lemon to hold it in place. Leave a good 2 inches in between each lemon slice and then repeat this process until you have a full garland.

7. Display your garland! I decided to wrap my garland around a wreath that is displayed on an antique window in my living room. I added some faux yellow billy ball stems in it as well to make it feel like a cohesive decor piece. There are many possibilities for how you can display your garland but you choose what you think looks best in your home.

Here are some options you can try:
- drape it across a mantel or a shelf
- wrap it around a post or beam
- layer it on a table top with some greenery for a pretty centerpiece
- mix it in with a display or collection that you love
- hang it in a swag-like manner above your kitchen window
- you can even display it on your deck or patio by wrapping it around a bush, a lattice, or a pergola!
Creating homemade decorations, like this garland, gives me such a sense of satisfaction. It is special to be able to decorate my home with something that I made and my hope is that you are encouraged to do the same. Follow this tutorial on how to make a lemon garland, run with it, and make it your own!

I would love to know how this project went for you and how you displayed it in your home. Comment below!
Check out more simple DIY projects here!


